|
I started experiencing problems
with my APEX 450 tube microphone, so I did a quick web search to see if
anyone else had any advice on the 450. I wound up at the
APEX
web site, and alas, no service manual for the now discontinued 450.
I did download the
460 manual and at least I had a place to start. You know, I'm at the point where I
won't purchase a product if it doesn't come with, or at least have
available, all the info I'm going to need to keep it going, but that's
another rant.
So you've landed here
and I assume that you have an APEX 450 and need some advice. But,
before we can go any further, I must post the standard
disclaimer.
DO NOT TRY THIS AT HOME! THIS POWER SUPPLY AND MICROPHONE CASE CONTAIN POTENTIALLY
DANGEROUS VOLTAGES! Got it? DANGER Will
Robinson DANGER!
If you're not familiar with high voltage electronics,
specifically tube electronics, actually electron valve; please take this thing to a
qualified technician. Ok, on with the show...
My mic would fire up ok, but after 10 or 15 minutes
it would quit on me; did I have a bad tube, was the power supply
crapping out, maybe a cabling problem? Lets check it out!
I popped open the power supply and
checked for any obvious problems,
burned components or traces, cold solder joints. Seeing nothing unusual
I powered her up and checked voltages. Everything seemed fine.
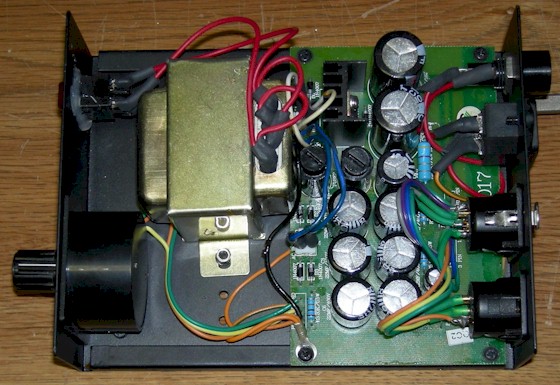 |
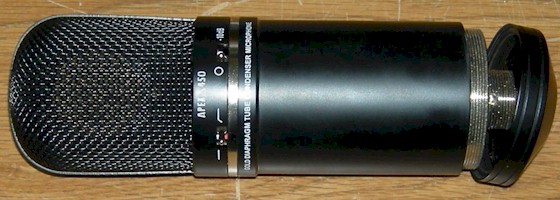
| APEX 450 Power Supply
Click Image For Full Screen View |
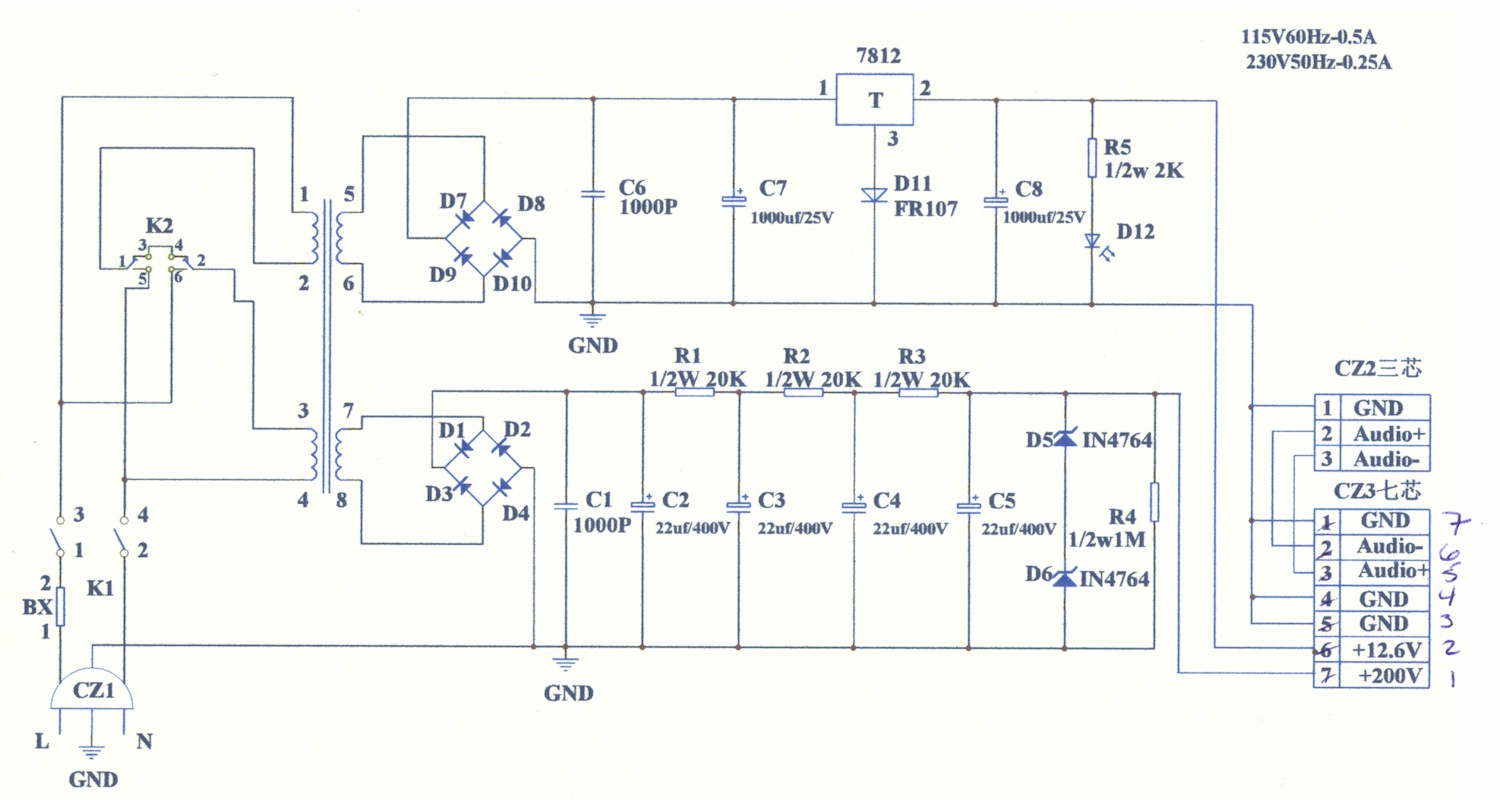
Below is the schematic for the 460 power supply,
not exactly the same as
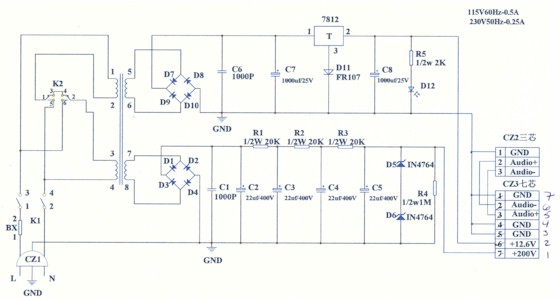 |
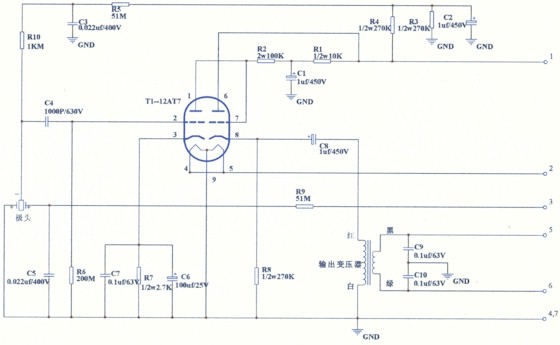
| APEX 460 Power Supply Schematic
Click Image For Full Screen View |
the 450, but close enough for rock 'n' roll. Note
that the pin out is backwards. Also, pin 3 is not ground, it is the variable
voltage that controls the polar patterns. And, I measured 6.6 volts on
pin 2 for the heater. Problem? Lets disassemble the mic.
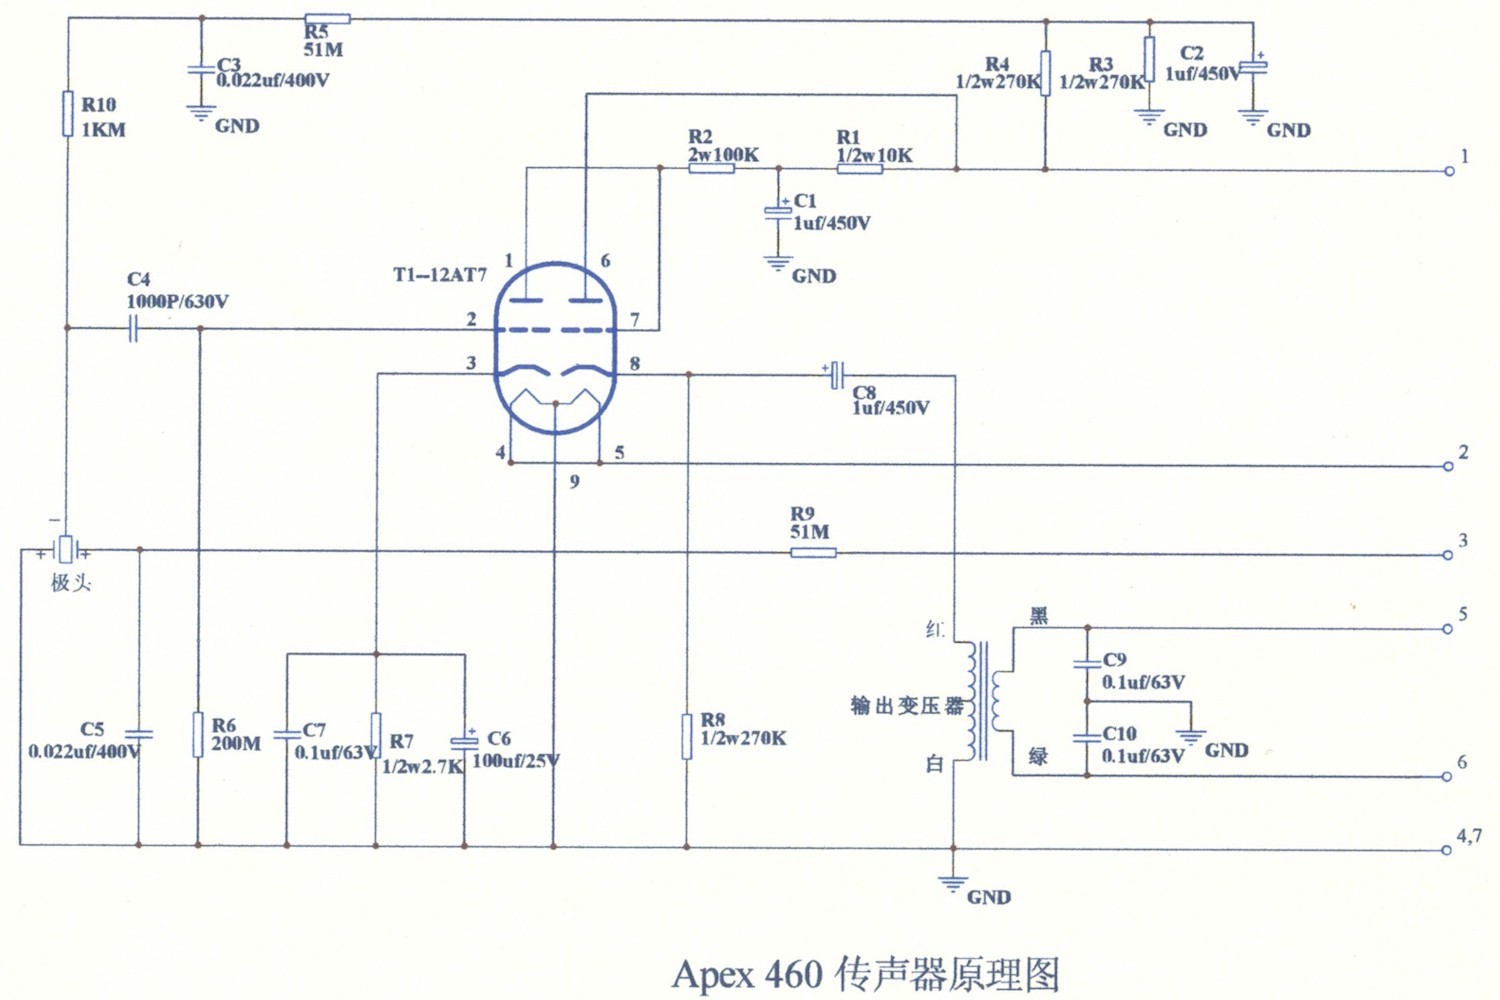
Lets have a look at the schematic for the 460, there
is a major difference. The 460 amplifies the signal, then utilizes stage
2 as a cathode follower, coupling via C8 to the transformer. The 450
couples the signal off the plate via C8 to the transformer. I favor the
460 layout, should be far less signal loss. Interesting variation here,
pin 5 (as are pins 6, 7 & 8) is grounded, effectively eliminating
half of the heater, hence the 6.6 volts from the power supply. I'm a
valve guy, and I didn't realize both sides of a dual triode are
independently heated. The 450 requires less heater current, less B+ current; BUT,
at the expense of more
signal loss. Thus more gain, and potentially more noise, required down
the signal chain. My vote goes to using the cathode follower.
 |
| APEX 460 Mic Schematic
Click Image For Full Screen View |
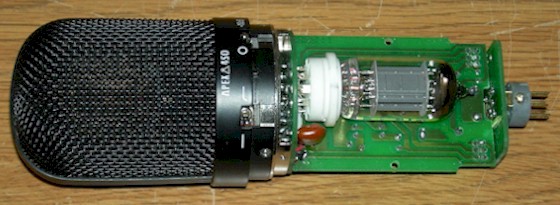
So, what was wrong with my APEX 450? I don't know! In
removing the board I pulled a couple of solder joints apart. Did I have
a cold joint, that when heated opened, and caused the problems? The
12AT7 seemed to work fine after I cleaned up all the solder joints. In
the process of pulling this thing apart several times I've noticed that
some of the lower board joints have left impressions in the insulator on
the lower end cap. I had to compress things each time I re-assembled the
mic and this may well have been the problem.
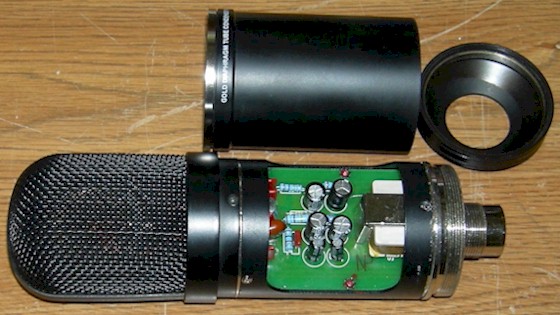
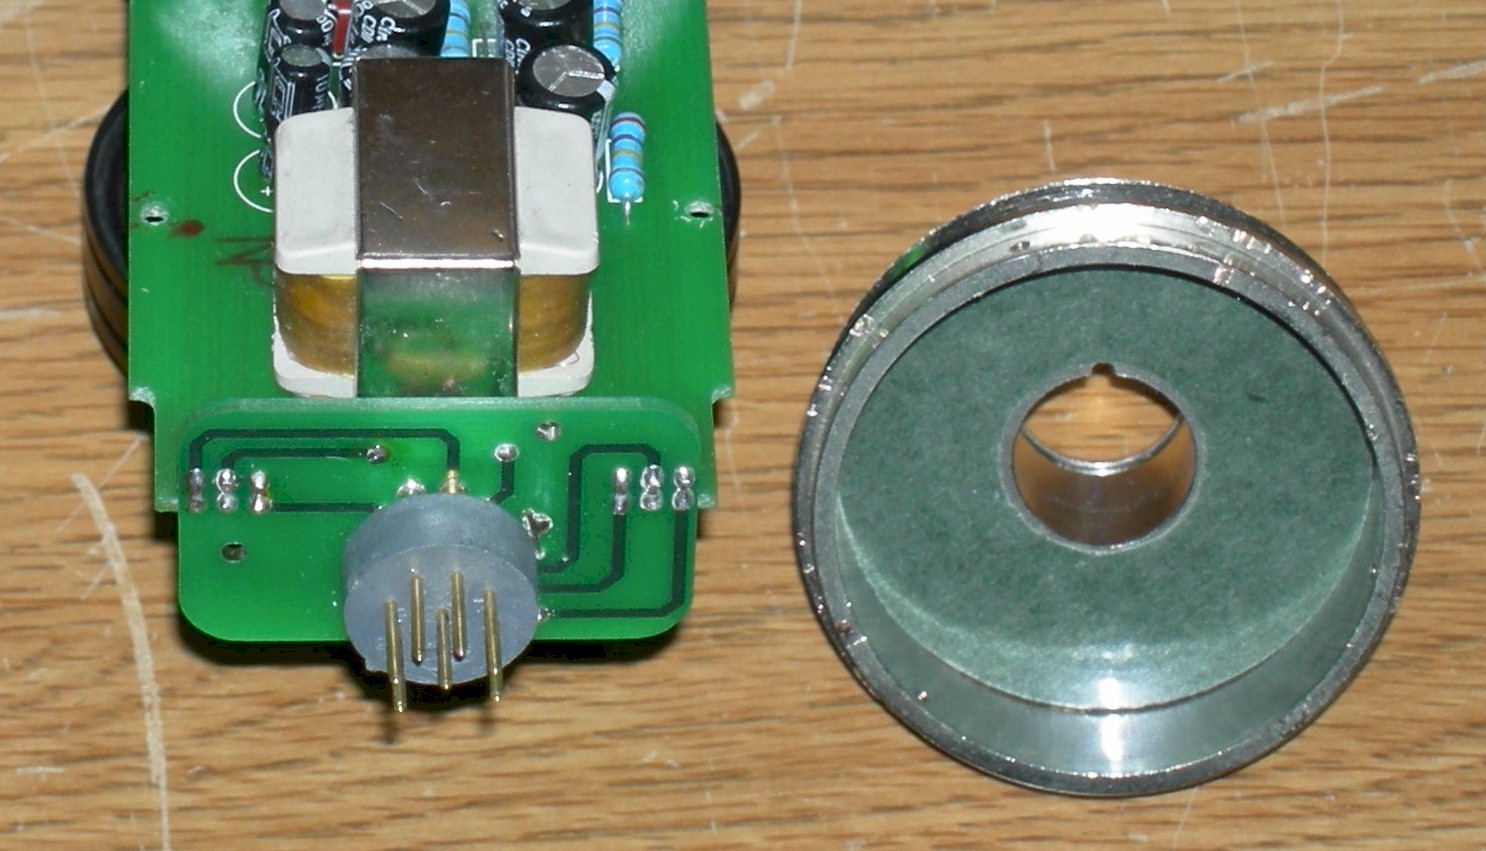
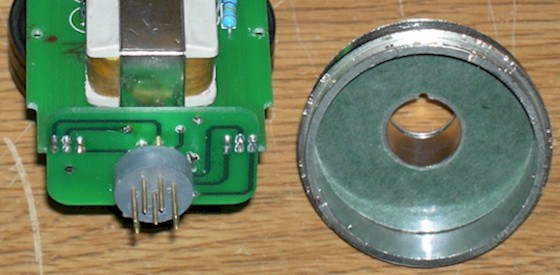 |
|
Check the end pcb for long pins, trim as
necessary. Click image for a better view. You can see where I pried on the end cap, not a good idea! Never
force things. |
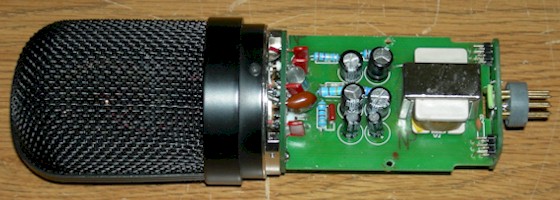
Pull the grille and check the capsule to make sure it
is mounted tightly.
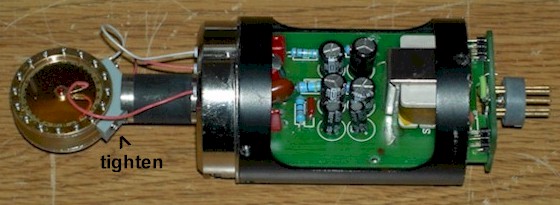 |
| The capsule was loose on its
base, tighten as shown if necessary. |
Good luck with your 450, I hope all you need to do
is change the valve. Feel free to email me if you have any questions, or
any insight. Also, this is a common Chinese manufactured large diaphragm
tube mic, so if you have any model numbers I can add for improved search
engine results, please forward them along. Just
a few notes here for the search engines; repairing, servicing APEX 450 GOLD DIAPHRAGM TUBE
CONDENSER MICROPHONE service manual. The pcb in the power supply is marked SKEE017,
main pcb marked SK.8, the top pcb is marked SK.8.M97.013. |